Shared hosting is one of the most popular and affordable ways to get a website online. It’s ideal for bloggers, small businesses, and startups that don’t need a dedicated server. But because multiple websites share the same server environment, security becomes a critical concern.
When one site on a shared server gets compromised, others may be at risk too — making it essential to implement strong protective measures from the start.
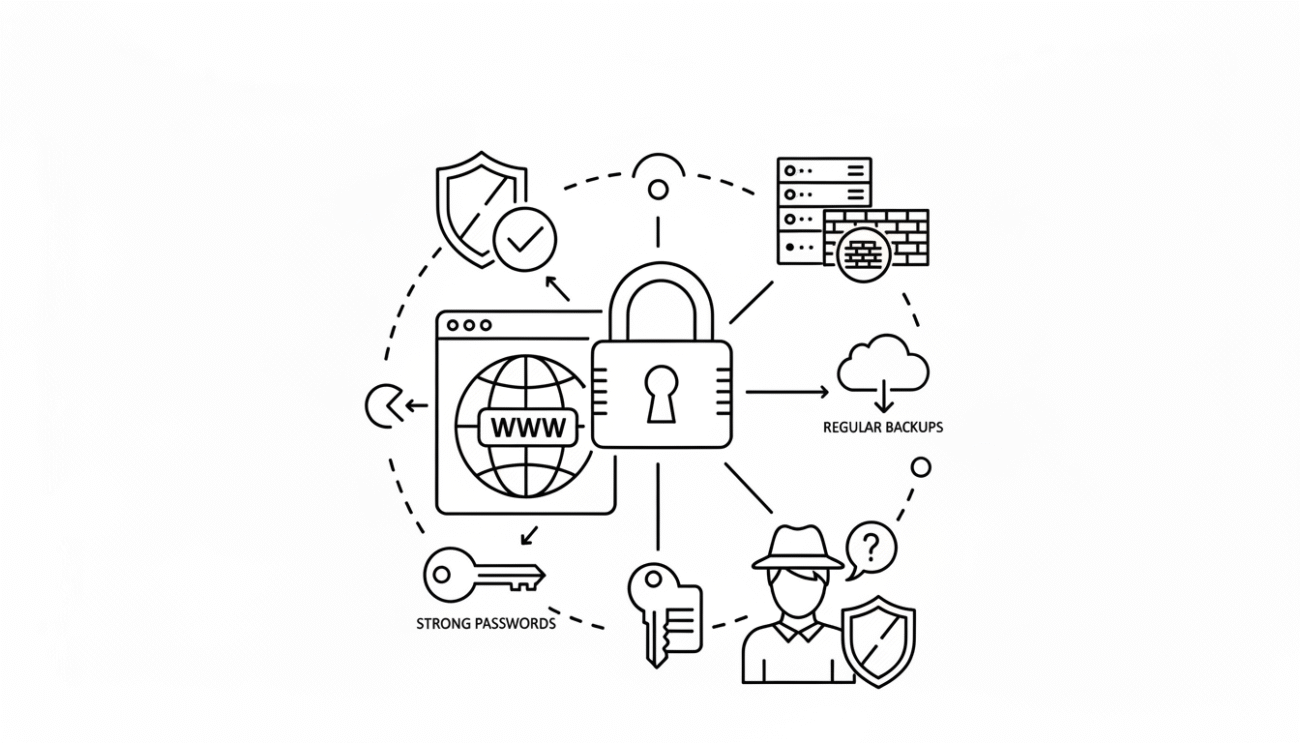
In this comprehensive guide, you’ll learn how to secure your website on shared hosting using simple, effective strategies that reduce risks, strengthen defenses, and keep your data safe.
1. Why Shared Hosting Requires Extra Security
In shared hosting, dozens or even hundreds of websites live on the same physical server, all using shared CPU, RAM, and storage resources.
While this keeps costs low, it also means a single vulnerability — like a weak password or outdated plugin — can potentially impact everyone on the server.
Common Security Risks on Shared Servers
- Cross-site contamination: Malware from another site may spread through poorly isolated accounts.
- Weak account isolation: Insecure configurations can expose neighboring users’ files.
- Brute-force and DDoS attacks: High-volume automated attacks targeting multiple sites.
- Outdated scripts: Old CMS versions or plugins invite hackers.
- Shared IP blacklisting: If one user sends spam or hosts malware, the shared IP may get blacklisted.
The good news is you can control most of these risks with proper configuration and best practices — even within shared hosting limits.
2. Choose a Secure Hosting Provider
Your first line of defense is your hosting company itself. Security begins at the server level, and not all providers treat it equally.
What to Look For in a Secure Shared Host
- Free SSL certificates included for every domain.
- Malware scanning and automatic removal.
- Account isolation technology (like CageFS or CloudLinux).
- Regular backups stored offsite.
- Firewall and DDoS protection at the network layer.
- 24/7 monitoring for intrusions or abnormal activity.
Before signing up, check if your host uses modern security architecture — it prevents most large-scale attacks before they reach your site.
3. Keep Your Website Software Updated
One of the simplest yet most effective ways to secure your website is by keeping everything up to date. Most hacking attempts exploit known vulnerabilities in outdated software.
Update Checklist
- Update your CMS (WordPress, Joomla, Drupal, etc.) regularly.
- Keep all themes and plugins current.
- Remove or deactivate unused plugins and templates.
- Update your PHP version from the hosting control panel.
If possible, enable automatic updates for core software and minor releases. This ensures patches are applied even when you’re not actively managing your site.
4. Use HTTPS and SSL Certificates
An SSL certificate encrypts the connection between your website and its visitors, protecting sensitive data like logins or payment details.
How to Enable SSL
Most shared hosting plans include free SSL via your control panel. Once activated:
- Install the SSL certificate for your domain.
- Force HTTPS redirection in your .htaccess or hosting dashboard.
- Verify that every page loads securely with the padlock symbol.
Using HTTPS not only protects users but also improves trust and search engine ranking.
5. Strengthen Your Passwords and Authentication
Weak passwords are one of the easiest attack vectors for hackers.
Best Practices for Strong Authentication
- Use complex passwords with uppercase, lowercase, numbers, and symbols.
- Avoid using the same password for multiple accounts.
- Change your hosting, FTP, and admin passwords every few months.
- Enable two-factor authentication (2FA) if your hosting provider supports it.
- Limit the number of administrative accounts on your website.
A password manager can help you generate and store strong, unique passwords securely.
6. Limit File and Directory Permissions
Improper file permissions can expose your website’s internal files to attackers.
Recommended File Permissions
- Folders: 755
- Files: 644
- Configuration files (e.g.,
wp-config.php): 600
These settings restrict write access while keeping the site functional. Avoid using 777 permissions, which allow anyone to modify your files.
7. Enable Web Application Firewall (WAF)
A Web Application Firewall filters and monitors HTTP traffic between your website and the internet, blocking malicious requests before they reach your server.
Benefits of Using WAF
- Blocks SQL injection, XSS, and brute-force attacks.
- Filters spam bots and fake traffic.
- Provides an additional security layer independent of your site’s code.
Many shared hosts now offer built-in WAF protection, which can be activated in your control panel or as part of managed security add-ons.
8. Configure Security Plugins or Tools
For CMS users (like WordPress), security plugins add another essential layer of protection.
Features to Look For
- Firewall and brute-force protection
- Malware scanning and file integrity checks
- Login protection and 2FA
- IP blocking and country restrictions
- Real-time activity monitoring
Be sure to install only trusted, well-reviewed security tools, and keep them updated regularly.
9. Secure Your Login Pages
Login pages are often the first targets of automated attacks. You can make them much harder to exploit with a few simple adjustments.
Tips to Protect Logins
- Limit login attempts to prevent brute-force attacks.
- Rename or hide default admin login URLs.
- Use CAPTCHA verification on login and registration forms.
- Set short session timeouts for inactive users.
- Restrict admin access by IP if possible.
These steps significantly reduce unauthorized access attempts.
10. Disable Directory Listing
If directory listing is enabled, visitors (and hackers) can see the files inside your web folders — exposing configuration files or scripts.
How to Disable Directory Listing
Add this line to your .htaccess file:
Options -Indexes
This simple change hides your file structure and protects sensitive information.
11. Restrict Access to Critical Files
Certain files hold sensitive data that should never be publicly accessible.
Protect These Files
.htaccesswp-config.phpor equivalent config files/cgi-bin/directory- Error logs and backup archives
Add rules in your .htaccess to deny all external access:
<FilesMatch "^(wp-config\.php|\.htaccess|error_log)$">
Order allow,deny
Deny from all
</FilesMatch>
This ensures these files remain readable only by the server.
12. Use Secure FTP (SFTP) Instead of FTP
Traditional FTP sends data — including passwords — in plain text, which can be intercepted. Always use SFTP or FTPS, which encrypt the data transfer.
Steps to Switch
- Use an FTP client that supports SFTP (e.g., FileZilla).
- Connect using port 22 (for SFTP).
- Disable standard FTP if your host allows it.
This simple switch prevents hackers from capturing your credentials during file transfers.
13. Keep Backups Regular and Offsite
Even the most secure websites can experience unexpected issues. Backups are your ultimate safety net.
Best Practices
- Schedule daily or weekly automated backups through your hosting control panel.
- Download copies manually before major updates or migrations.
- Store backups offsite — either on your computer or in secure cloud storage.
- Verify that backups include both files and databases.
Having multiple backup versions ensures you can recover quickly from hacks or data loss.
14. Monitor Website Activity and Logs
Regular monitoring helps detect suspicious behavior before it causes serious damage.
Key Logs to Review
- Access logs: Show who visits your site and from where.
- Error logs: Reveal recurring issues or attempted exploits.
- Login activity: Highlights unauthorized attempts or repeated failures.
Set up automated alerts for unusual spikes in traffic or repeated login failures.
15. Isolate Your Email and Applications
If your shared hosting account includes email, keep it separate from your main website whenever possible.
A spam or phishing attack on your email service can affect your hosting account.
Tips
- Use dedicated email hosting or cloud-based email platforms.
- Avoid hosting multiple unrelated websites on one shared plan.
- Create separate FTP and database users for each project.
Account separation limits damage if one component gets compromised.
16. Disable Unused Features or Services
Every active service on your server is a potential attack surface. Disable what you don’t need.
Examples to Turn Off
- Anonymous FTP access
- Unused subdomains or databases
- Unnecessary CMS features or sample content
- Demo or test accounts
Fewer active services mean fewer potential vulnerabilities.
17. Set Up Automatic Malware Scans
Many shared hosts include free or premium malware scanning tools. Schedule regular scans to detect issues before they spread.
Scan Recommendations
- Run weekly or daily scans of your entire website directory.
- Enable automatic quarantine for infected files.
- Check for suspicious scripts, redirects, or hidden iFrames.
If malware is found, delete or replace affected files immediately and change all passwords.
18. Protect Against DDoS Attacks
A Distributed Denial of Service (DDoS) attack floods your website with fake traffic, overloading the shared server.
Defensive Measures
- Enable DDoS protection in your hosting panel (many hosts include this).
- Use a content delivery network (CDN) to distribute load globally.
- Block abusive IPs automatically using firewalls or plugins.
Even shared hosts can mitigate DDoS attacks with the right configuration and CDN support.
19. Secure Database Access
Your website’s database contains valuable data — from user information to passwords. Protect it carefully.
Database Security Tips
- Use a unique, strong password for database users.
- Restrict access to localhost only.
- Rename the default database prefix (e.g., change
wp_to something custom). - Regularly back up your database and clean unused tables.
Small adjustments here can prevent large-scale breaches later.
20. Protect Against Cross-Site Scripting (XSS) and Injection Attacks
Hackers often use injection attacks to manipulate code and gain unauthorized access.
Prevention Steps
- Validate all user inputs (especially forms and comments).
- Disable HTML or JavaScript in comment fields.
- Use your CMS’s built-in sanitization functions.
- Keep all themes and plugins from reputable sources only.
Even within shared hosting, these simple coding practices strengthen your website’s resilience against malicious injections.
21. Use Content Delivery and Caching Wisely
While primarily for performance, caching and CDNs also improve security by reducing server exposure and absorbing traffic spikes.
Security Benefits
- Hides your server’s real IP address.
- Blocks suspicious regions automatically.
- Reduces brute-force attempts through rate limiting.
Enable caching and integrate a CDN via your hosting dashboard to enhance both speed and protection.
22. Regularly Review Your Security Settings
Website security is not a “set it and forget it” task. Schedule regular reviews of all security measures.
Monthly Security Checklist
✅ Update all software and plugins
✅ Review file permissions
✅ Check backups and restore points
✅ Scan for malware
✅ Change passwords if needed
✅ Monitor login attempts and server logs
A monthly checkup ensures that even small vulnerabilities don’t evolve into major breaches.
23. When to Upgrade from Shared Hosting
If your website outgrows shared hosting or faces constant security issues, it may be time to move up.
Signs You Should Upgrade
- Frequent resource limit warnings
- Slow performance due to shared resources
- Repeated attacks or compromised files
- Need for root access or custom server configuration
Upgrading to VPS or managed hosting gives you stronger isolation and advanced security controls.
24. The Ultimate Shared Hosting Security Checklist
Before we conclude, here’s a quick checklist to confirm your site is fully protected:
✅ Free SSL certificate active and HTTPS enforced
✅ All software and plugins updated
✅ Strong passwords and 2FA enabled
✅ File permissions restricted (644/755)
✅ WAF and malware scanning enabled
✅ Directory listing disabled
✅ Regular offsite backups created
✅ FTP access limited to SFTP only
✅ Database credentials secured
✅ Security plugin or firewall installed
✅ Monthly audits scheduled
Tick every box, and your shared hosting site will be significantly safer against most threats.
25. Final Thoughts
Shared hosting doesn’t have to mean weak security. With the right configuration and consistent maintenance, you can run a secure, stable website even on a shared environment.
Focus on layered protection — secure hosting, strong authentication, regular updates, and reliable backups. Each layer adds another barrier between your website and potential attackers.
Remember: hackers often go after the easiest targets. By following these steps, you make your site a far more difficult — and less appealing — target.
In short: security on shared hosting is about awareness and discipline. Keep your tools updated, monitor activity, and stay proactive — and your website will remain safe, stable, and successful for years to come.